The difference between a patch and a seamless wall
Most drywall patches look fine from across the room… until you walk a little closer.
That’s when you start to notice it—the slight bump, the uneven texture, the way the light hits it differently. A patch that technically “fixed the hole” still ends up standing out.
The difference between a patch that blends in and one that doesn’t usually comes down to a few small—but important—details.
It starts before the patch even goes in
A clean, seamless result begins with how the damaged area is prepared.
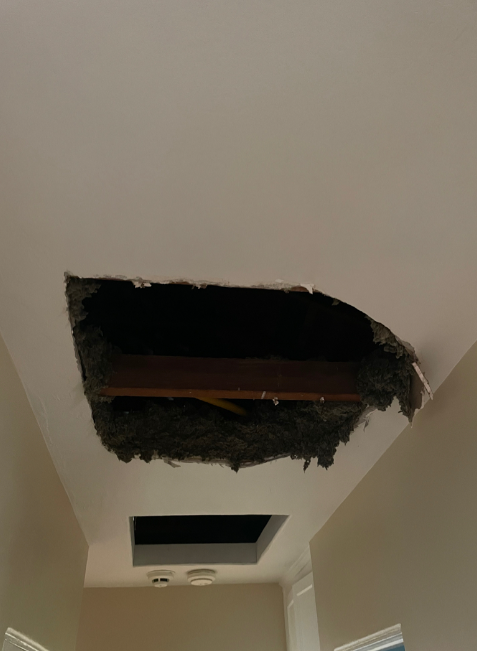
If the edges around the hole are rough, crumbly, or uneven, the patch won’t sit properly. We typically square off the opening and remove any weak material so the new piece has a solid, clean edge to tie into.
Skipping this step is one of the biggest reasons patches end up looking lumpy or cracked later.
The backing matters more than you’d think
For anything bigger than a small hole, proper backing is key.
This could be wood strips or another support behind the drywall that gives the patch something to anchor to. Without it, the patch can flex slightly over time—and even a tiny bit of movement will show through the finished surface.
A patch might look good on day one, but without solid backing, it rarely stays that way.
Where things usually go wrong: the mud work
This is where most patches either come together… or fall apart visually.
Applying joint compound isn’t just about filling the gap. It’s about gradually building and feathering the surface so there’s no visible transition between old and new drywall.
Too much compound in one area creates a hump. Too little leaves a dip. Rushing between coats leads to shrinkage and visible lines later.
A clean patch usually takes multiple thin layers, proper drying time, and careful sanding in between.
Texture: the detail most people notice first
Even if the surface is perfectly flat, texture can give the patch away immediately.
Matching texture isn’t just about spraying something on the wall. Every home has slight variations—orange peel, knockdown, hand texture—and even within those, the pattern, density, and thickness matter.
Getting this right often takes a bit of blending beyond just the patched area so it transitions naturally.
Paint is the final test
A patch can look perfect before paint—and then suddenly stand out after.
That’s because fresh paint reflects light differently than older, slightly faded paint. In many cases, we recommend painting the full wall (not just the patch) to keep everything consistent.
It’s a small step that makes a big difference in the final result.
The takeaway
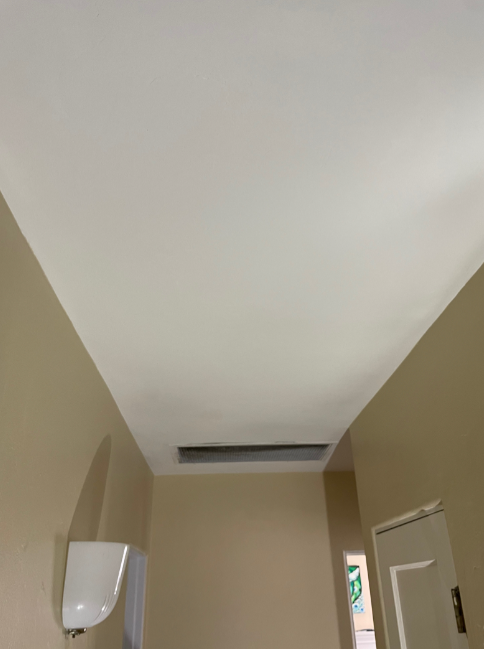
A drywall patch isn’t just about covering a hole—it’s about making the repair disappear.
When each step is done carefully—from prep to texture to paint—the patch shouldn’t draw your eye at all. It should just look like the wall has always been that way.
If you’ve got a spot that’s bothering you or a patch that didn’t come out quite right, we’re always happy to take a look and walk you through the options.